Capellini, with its delicate strands no thicker than a hair, might just be the most elegant pasta in your pantry. The first time I twirled these gossamer-thin noodles around my fork in a small trattoria in Naples, I knew I’d discovered something special. Today, I’m excited to share everything I’ve learned about this refined Italian pasta, from selecting the perfect brand to creating restaurant-worthy dishes in your own kitchen.
Table of Contents
Why You’ll Love Learning About Capellini
- Incredibly Versatile: While it may look delicate, capellini can stand up to a variety of sauces and preparations, making it perfect for both quick weeknight dinners and elegant entertaining.
- Quick-Cooking: Thanks to its ultra-thin profile, capellini cooks in just 2-3 minutes, faster than any other pasta variety.
- Foolproof: Once you understand the basics, cooking perfect capellini is surprisingly simple. I’ll show you exactly how to achieve that ideal al dente texture every time.
What is Capellini?
Capellini, which literally means “little hairs” in Italian, is one of the thinnest pasta varieties you can find. With a diameter between 0.85 and 0.92 millimeters, it’s slightly thicker than angel hair pasta (capelli d’angelo) but still remarkably fine.
The History Behind the Strands
This elegant pasta’s origins are contested between three regions of Italy: the area around Genoa, Naples, and the Ciociaria in central Italy. Its delicate nature made it particularly well-suited for light preparations featuring fresh herbs, olive oil, and seafood, especially in coastal regions where these ingredients were abundant. Unlike heartier pasta shapes meant for robust meat sauces, capellini’s fine texture complements these lighter ingredients perfectly.
Capellini vs. Angel Hair: The Subtle Difference
While many use these terms interchangeably, there’s actually a distinction:
- Capellini: 0.85-0.92mm in diameter
- Angel Hair: 0.78-0.88mm in diameter
This small difference makes capellini slightly more versatile and less prone to clumping than its even thinner cousin. I find capellini holds its shape better when tossed with sauce, while still maintaining that luxurious, delicate texture we all love.
Quality Guidelines and Selection
How to Choose the Best Capellini
After years of cooking with various brands and types, I’ve learned what to look for in quality capellini:
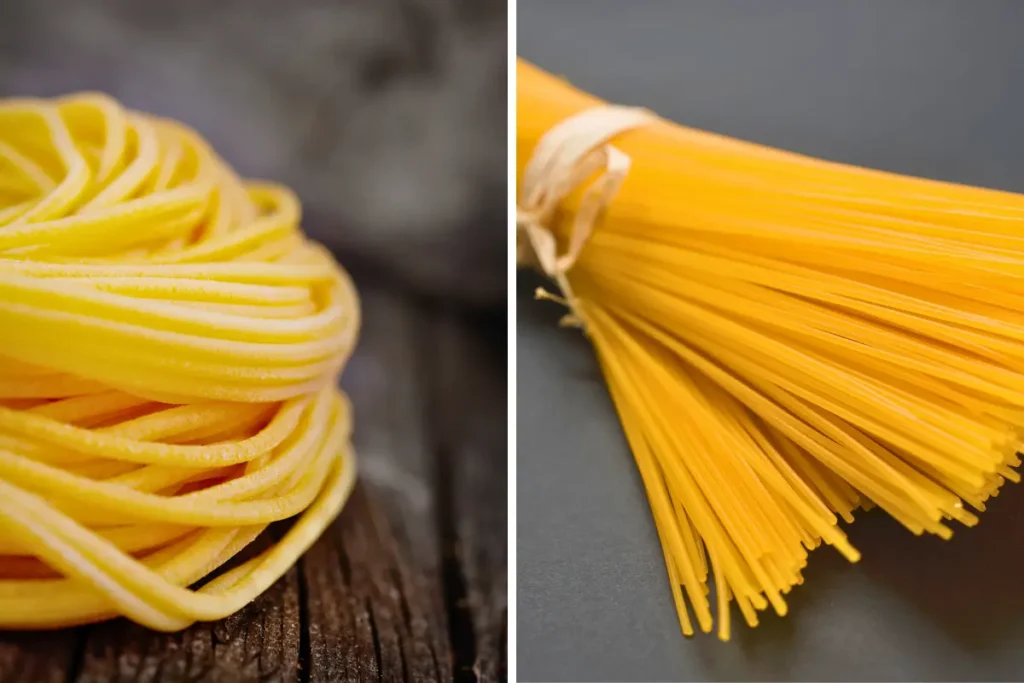
- Color: The best dried capellini has a consistent, pale golden color without dark spots or discoloration.
- Texture: Look for a slightly rough surface texture, which indicates the pasta was dried slowly and will better hold sauce.
- Packaging: Choose boxes or packages that are intact without any breaks or tears. You want to avoid exposed pasta that might be broken or compromised.
Important Shopping Tip: When shopping, check the package carefully – true capellini should be labeled as ‘capellini’ or ‘capellini no.1’, not ‘angel hair’ or ‘capelli d’angelo’. The diameter should be listed as 0.85-0.92mm. This small difference in thickness matters for achieving the perfect texture and sauce adhesion.
Fresh vs. Dried: Which Should You Choose?
While fresh pasta has its place, I actually prefer dried capellini for several reasons:
- Consistency: Dried capellini provides more reliable results
- Availability: It’s easier to find and store
- Texture: The dried version actually holds sauce better
- Cost-effectiveness: Lasts longer and is typically less expensive
Storage Tips
Proper storage is crucial for maintaining your capellini’s quality:
- Store in an airtight container
- Keep in a cool, dry place
- Avoid exposure to direct sunlight
- Use within one year for best results
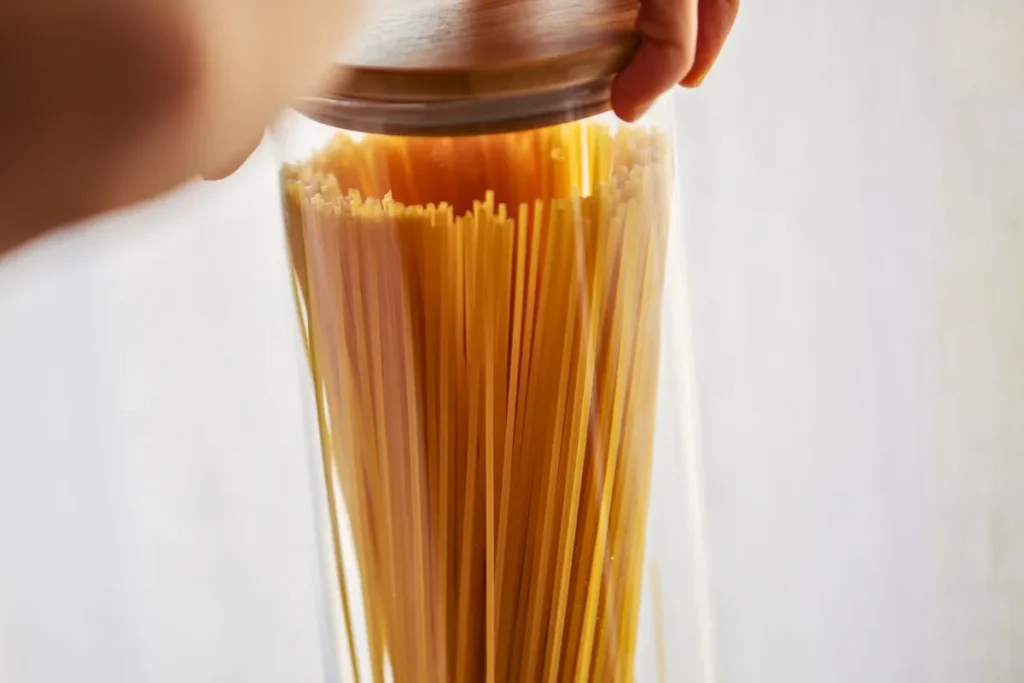
Pro tip: I like to transfer my capellini to a tall glass container – it protects the delicate strands and looks beautiful on the shelf!
Cooking Perfect Capellini: Step-by-Step Guide
Nothing’s worse than a clumpy mess of overcooked capellini. After countless batches (and yes, a few early disasters), I’ve perfected the technique for cooking this delicate pasta. Let me show you how to achieve that perfect al dente texture every single time.
Essential Equipment
Before you start, gather these kitchen essentials:
- Large pot (at least 6-quart capacity)
- Long-handled spoon or fork for stirring
- Colander
- Timer (your phone works great!)
The Perfect Water-to-Pasta Ratio
Here’s what I’ve found works best:
- 4-6 quarts of water per 1 pound of capellini
- 1½ tablespoons of salt per pound of pasta
- Never add oil to the water (I’ll explain why below!)
Step-by-Step Cooking Process
- Bring Water to a Rolling Boil
- Start with cold water
- Cover the pot until boiling
- Add salt only after water boils
- Add the Capellini
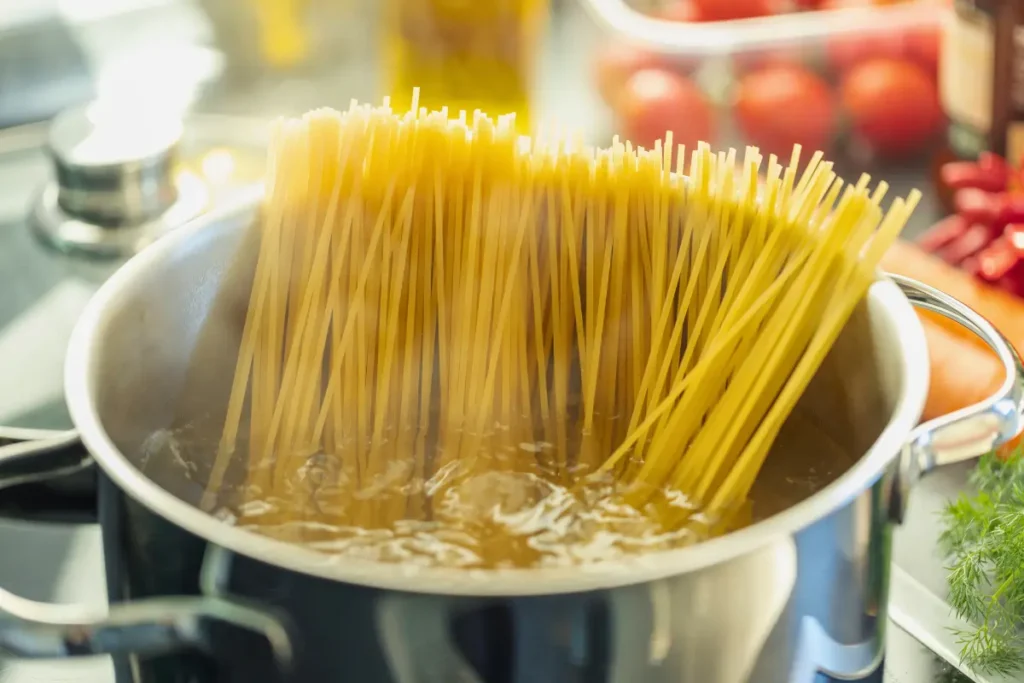
- Hold the pasta bundle upright
- Fan it out as you lower it into the water
- Gently push it down as it softens
- The Critical Timing
- Set timer for 2 minutes
- Stir once after 30 seconds
- Test at 1½ minutes
- Never cook longer than 3 minutes
Pro Tip: I always save about 1 cup of pasta water before draining. This starchy liquid is liquid gold for creating silky smooth sauces!
Best Sauce Pairings
Capellini’s delicate nature makes it perfect for lighter sauces that won’t overwhelm its texture. Think of it as wearing a fine silk dress – you want accessories that enhance, not overpower.
Light Sauces (Ideal)
- Simple olive oil and garlic
- Fresh tomato and basil
- Lemon and herbs
- Light cream sauces
Medium-Body Sauces (Use Sparingly)
- Pesto
- Light marinara
- Seafood-based sauces
Sauces to Avoid
- Heavy meat ragù
- Thick cream sauces
- Chunky vegetable sauces
The Perfect Sauce-to-Pasta Ratio
Unlike heartier pasta shapes, capellini needs less sauce to shine. My golden ratio is:
- 3-4 tablespoons of light sauce per serving
- 2-3 tablespoons of medium-bodied sauce per serving
- Always toss in the pan, never top with sauce
Pro Tip: When in doubt, use less sauce than you think you need. You can always add more, but overdressed capellini can quickly become heavy and clumpy.
Essential Capellini Recipes
These four essential capellini recipes showcase the versatility of this delicate pasta while maintaining its elegant nature. Each recipe has been tested multiple times in my kitchen to ensure foolproof results.
Classic Capellini Pomodoro
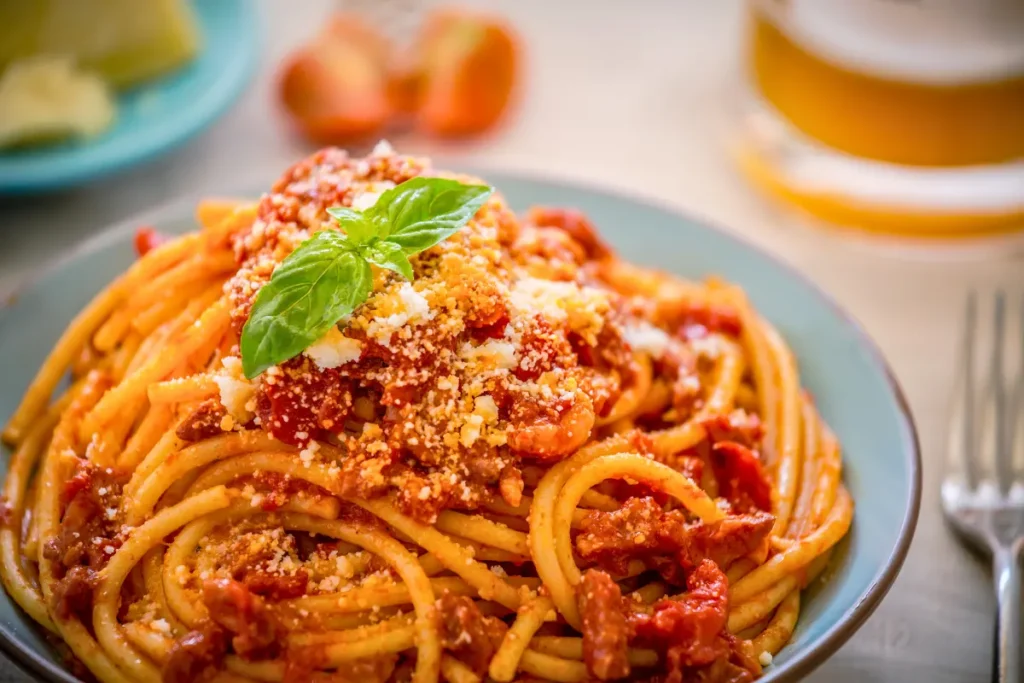
This light, fresh tomato sauce is arguably the perfect partner for capellini. The key is using peak-season tomatoes and cooking them just enough to create a sauce that clings to each strand without weighing it down.
Why You’ll Love This Recipe
- Ready in just 15 minutes
- Uses simple, fresh ingredients
- Light yet satisfying
- Perfect for warm weather dining
The Ingredients
- 1 pound capellini
- 2 pounds cherry tomatoes
- 4 tablespoons extra-virgin olive oil
- 4 cloves garlic, thinly sliced
- Fresh basil leaves
- Sea salt and freshly ground black pepper
- Freshly grated Parmesan cheese
Step-by-Step Instructions
- Bring a large pot of water to boil (remember our cooking guidelines above!)
- Pour the olive oil into your preheated pan
- Add garlic, cook until fragrant
- Scatter the tomatoes into the pan and let them soften and release their juices naturally
- Season with salt and pepper
- Cook capellini according to our perfect timing method
- Introduce the pasta to your sauce with gentle movements, incorporating spoonfuls of the warm cooking water until each strand glistens
- Finish with fresh basil and Parmesan
Lemon and Olive Oil Capellini
This bright, citrusy dish is my go-to for quick weeknight dinners or elegant lunches. The sauce is barely a sauce at all – just good olive oil, fresh lemon, and herbs creating a light coating that lets the capellini shine.
Why You’ll Love This Recipe
- Ready in 15 minutes
- Bright, fresh flavors
- Perfect hot or cold
- Great for summer entertaining
- Pairs beautifully with seafood or grilled vegetables
The Ingredients
- 1 pound capellini
- ½ cup extra-virgin olive oil
- Zest of 2 lemons
- Juice of 3 lemons (about ⅓ cup)
- 2 cloves garlic, finely minced
- ¼ cup fresh parsley, finely chopped
- 2 tablespoons fresh basil, chiffonade
- ½ teaspoon red pepper flakes (optional)
- Salt and freshly ground black pepper
- Freshly grated aged Parmigiano-Reggiano (about ½ cup for mixing, extra for the table)
Step-by-Step Instructions
- Bring a large pot of water to boil (following our earlier guidelines)
- Create your citrus base by whisking together the fragrant olive oil, freshly grated zest, bright lemon juice, aromatic garlic, and spicy pepper flakes in your serving vessel
- Let this mixture sit while you prepare the pasta (this allows the flavors to meld)
- Cook capellini for exactly 2 minutes
- Before draining, set aside a cup of the starchy pasta cooking water
- While pasta is still hot, toss it with the lemon-oil mixture
- Add herbs and Parmesan cheese
- Gradually add pasta water as needed to create a silky sauce
- Season generously with salt and black pepper
- Present hot, offering additional cheese at the table
Recipe Tips
- Use the best quality olive oil you can find – it makes a difference in this simple preparation
- Don’t skip the pasta water – it’s essential for creating the perfect texture
- Consider enriching the dish with toasted pine nuts or briny capers for additional depth
- For a special touch, try adding some fresh mint along with the other herbs
Make It Your Own
- Transform this into a seafood dish by nestling in flame-kissed shrimp or golden-seared scallops
- Toss in fresh cherry tomatoes for color and flavor
- Include toasted pine nuts for crunch
- When springtime arrives, celebrate by dotting the pasta with sweet, tender peas
Pro Tip: This dish is also delicious served at room temperature, making it perfect for picnics or summer buffets.
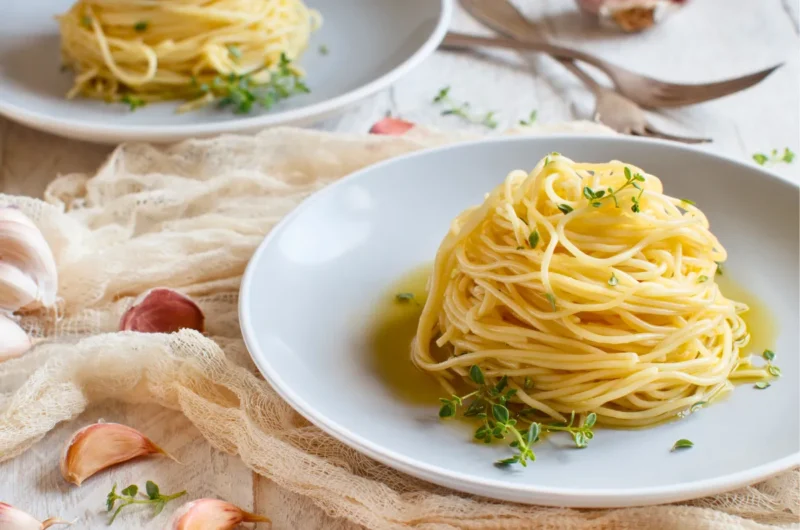
Garlic and Oil (Aglio e Olio)
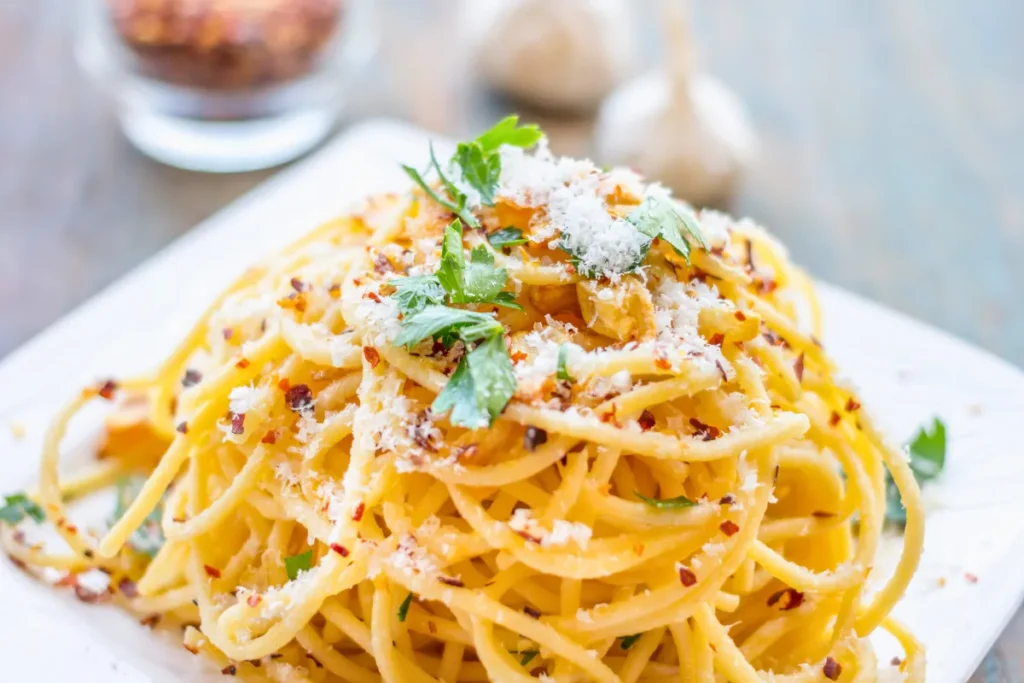
This classic Italian preparation proves that simple ingredients, prepared properly, can create an extraordinary dish. The key is getting the garlic perfectly golden and infusing the oil with its flavor.
Why You’ll Love This Recipe
- 5-ingredient simplicity
- Ready in 10 minutes
- Pantry-friendly ingredients
- Restaurant-quality results
The Ingredients
- 1 pound capellini
- 6 tablespoons extra-virgin olive oil
- 8 large cloves garlic, thinly sliced
- ½ teaspoon red pepper flakes
- ⅓ cup fresh parsley, finely chopped
- Salt and freshly ground black pepper
- ½ cup freshly grated Parmesan cheese (optional)
Step-by-Step Instructions
- Start your pasta water following our guidelines above
- While water heats, slice garlic paper-thin
- Begin by warming your olive oil in a wide, heavy-bottomed pan over gentle heat
- Scatter the garlic slivers and chili flakes into the warm oil, allowing them to perfume the oil until the garlic takes on a pale honey color
- Cook capellini for exactly 2 minutes
- Reserve 1 cup pasta water before draining
- Marry the pasta with your aromatic oil, incorporating small ladlefuls of cooking water until the sauce embraces each strand
- Crown your creation with fresh parsley, season to taste, and dust with cheese if desired
Pro Tip: Watch the garlic carefully – it should be golden, not brown. Brown garlic will taste bitter and ruin the dish.
Seafood Capellini
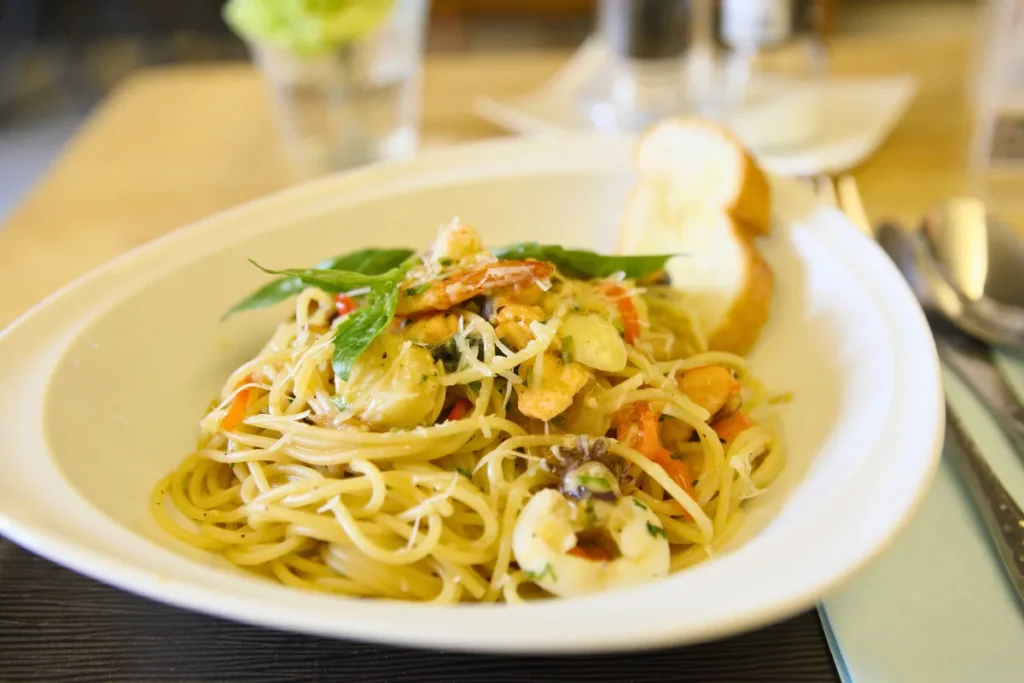
This elegant seafood preparation makes capellini feel special-occasion worthy while remaining surprisingly simple to prepare.
Why You’ll Love This Recipe
- Restaurant-quality presentation
- Light yet luxurious
- Perfect for entertaining
- Ready in under 30 minutes
The Ingredients
- 1 pound capellini
- 1 pound mixed seafood (shrimp, scallops, mussels)
- 4 tablespoons extra-virgin olive oil
- 4 cloves garlic, minced
- ½ cup dry white wine
- 2 tablespoons butter
- Juice of 1 lemon
- ¼ cup fresh parsley, chopped
- Salt and freshly ground black pepper
- Optional: red pepper flakes
Step-by-Step Instructions
- Clean and prepare seafood (shell mussels, devein shrimp)
- Warm your widest cooking vessel over a lively flame, then coat the base with a spiraling stream of olive oil
- Cook seafood in batches until just done, remove and set aside
- In same pan, sauté garlic until fragrant
- Add wine, simmer until reduced by half
- Cook capellini according to instructions
- Finish the sauce by melting in the butter and stirring in fresh lemon juice
- Create a silky finish by carefully mixing the pasta and sauce together, adding small amounts of the reserved cooking liquid until the consistency is just right
- Return seafood to pan, heat through
- Finish with parsley and seasonings
Nutritional Information
Understanding capellini’s nutritional profile helps you make informed decisions about portion sizes and meal planning. Here’s what you need to know about a standard 2-ounce (56g) serving of dry capellini:
Basic Nutritional Breakdown
- Calories: 200
- Carbohydrates: 42g
- Protein: 7g
- Fat: 1g
- Fiber: 2g
- Iron: 10% DV
How It Compares
Capellini vs. other pasta types (per 2-oz serving):
- Regular Spaghetti: Similar calories, slightly less surface area
- Angel Hair: Nearly identical profile, slightly fewer calories
- Fettuccine: More calories and carbs due to thickness
Dietary Considerations
- Vegetarian-friendly
- Low in fat
- Good source of complex carbohydrates
- Contains some protein
- Iron-rich
Pro Tip: For a more balanced meal, pair capellini with protein-rich seafood or legumes, and plenty of vegetables.
Tips for Serving and Presentation
After mastering the cooking, the presentation is what takes your pasta from good to spectacular. Here’s everything I’ve learned about serving this delicate pasta perfectly every time.
Perfect Portioning
The thin nature of capellini means portions can be tricky. Here’s what I recommend:
- First course: 2 ounces dry pasta per person
- Main course: 3-4 ounces dry pasta per person
- Family style: Calculate 4 ounces per person and add an extra portion
Plating Techniques
The Classic Twist
- Use a large fork and spoon
- Gather a portion of pasta
- Twist gently to form a neat nest
- Place carefully in the center of a warmed plate
Family Style
- Use a large, warmed serving bowl
- Create height by gently lifting and folding the pasta
- Leave room for serving utensils
- Garnish the entire dish, not just the center
Temperature Matters
- Serve on warmed plates (I run mine under hot water and dry them)
- Don’t let capellini sit too long – it cools quickly
- For cold preparations, rinse immediately after cooking and toss with oil
Make-Ahead Tips
While capellini is best served fresh, sometimes you need to prep ahead:
- Cook pasta 1 minute less than usual
- Toss with a small amount of oil
- Spread on a baking sheet to cool
- Refrigerate for up to 4 hours
- Revitalize the pasta with a swift 30-second hot water bath
Frequently Asked Questions
Can You Break Capellini Before Cooking?
While you technically possible, I strongly advise against it. Here’s why:
- Breaking changes the traditional eating experience
- Shorter strands are harder to twirl
- The pasta won’t hold sauce as well
- Traditional Italian preparation calls for full-length strands
Help! My Pasta Is Clumping. What Went Wrong?
This is probably the #1 question I receive. Here’s your troubleshooting guide:
- Not enough water (use 6 quarts per pound)
- Water wasn’t boiling vigorously
- Pasta wasn’t stirred initially
- Overcooked (stick to 2-3 minutes maximum)
Pro Tip: If your pasta starts to clump while serving, refresh it with a splash of hot cooking water.
What Are the Best Substitutes?
If these fine strands aren’t available, try these alternatives:
- Angel hair pasta (slightly thinner)
- Thin spaghetti (slightly thicker)
- Vermicelli (similar thickness)
Is There a Gluten-Free Option?
Yes! Look for:
- Rice-based varieties
- Corn and quinoa blends
- Chickpea or lentil varieties
Note: Cooking times may vary for gluten-free versions. Keep a watchful eye on the texture after the first minute of cooking.
How Long Can I Store Cooked Pasta?
Storage guidelines:
- Room temperature: 2 hours maximum
- Refrigerated: 3-5 days in airtight container
- Frozen: Not recommended (texture becomes mushy)
Why Does My Sauce Slide Off the Pasta?
This common issue usually happens because:
- Pasta was rinsed after cooking (don’t do this!)
- Not enough pasta water was reserved for the sauce
- Sauce is too thin or watery
Pro Tip: Always combine pasta and sauce in the pan, never top it on the plate.
Bringing It All Together: Your Capellini Journey
Mastering this elegant pasta opens up a world of effortless meals. From its delicate texture to its lightning-quick cooking time, these fine strands prove that simplicity often yields the most memorable dishes.
Key Takeaways for Capellini Success
Remember these foundational points:
- Seek out pasta with a coarse, porous appearance
- Always prep your ingredients before boiling water
- Watch those precious minutes during cooking
- Embrace light, complementary sauces
- Save that precious cooking water
Looking Ahead
The beauty of capellini lies in its versatility. Once you’ve mastered the basics, consider:
- Experimenting with seasonal ingredients
- Creating your own signature sauce combinations
- Exploring regional Italian preparations
- Hosting a pasta-tasting dinner party
Your Turn
Has this guide inspired your next pasta night? Write to me about your capellini creations!
- Which sauce pairing became your favorite?
- How did our timing techniques work for you?
- What creative combinations have you discovered?
- Any questions about perfecting your technique?
Remember, like any culinary skill, preparing perfect capellini comes with practice. Don’t be discouraged if your first attempt isn’t restaurant-worthy – each time you prepare it, you’ll develop a better feel for this elegant pasta’s unique characteristics.
Now, it’s time to bring these techniques into your own kitchen. Gather your ingredients, pull out your largest pot, and prepare to create something truly special. Buon appetito!

